SharePoint Integration using Federated Search
Important: These instructions apply to SharePoint Classic. For a comparison of SharePoint Classic vs SharePoint Modern Experience, see the following article: https://www.mrsharepoint.guru/sharepoint-classic-vs-modern/.
You can integrate PolicyTech so that certain PolicyTech documents appear in SharePoint search results. This integration method returns only those documents in a site with an API key assigned, documents must be in a published status and must have a security level designation of All Users or Public.
Activate the PolicyTech API
- In the navigation pane, click Settings & Tools > IT Settings, and then click Registration Info.
- In the Enter Registration Code box, copy and paste the new registration code that NAVEX Customer Support emailed to you, and then click Submit Registration Code.
- Refresh the browser window to reload PolicyTech with the new registration code.
Create an API Key
- In the navigation pane, click Settings & Tools > IT Settings, and then click API Keys.
- Click New.
- Type a display name. This is for your own use in managing keys.
The Key box is not editable. A key will automatically generate when you save.
- (Optional) To limit the IP addresses that can log into PolicyTech via the API, in the IP Range(s) box type one or more IP ranges.
You can use both IPv4 (32 bit) and IPv6 (128 bit) IP address formats to specify a range. Type the lower limit of the IP range first, followed by a dash and then the upper limit of the IP range. To include multiple ranges, separate each range with a comma. Do not include a space before or after the comma containing the addresses of one or more servers.
IPv4 addresses are represented as four numbers separated by periods where each number can be zero to 255, such as 1.160.10.240.
IPv6 addresses are represented as eight groups of four hexadecimal digits separated by colons, such as 2001:0db8:85a3:0042:1000:8a2e:0370:7334.
- In the Sites box, select only those sites you want SharePoint users to have access to.
- (Optional) If you want SharePoint users to also have access to any sites that may be added to PolicyTech in the future, select Automatically select new sites as they get created.
- Click Save to generate the key and display it in the Key box.
Create and Test a Search Result Source in SharePoint
Important: Configuring SharePoint using Microsoft 365 varies depending on how you choose to set up your Search Results Source. Contact your SharePoint administrator for specific instructions.
- In the Office 365 Admin Center, click Admin, and then click SharePoint.
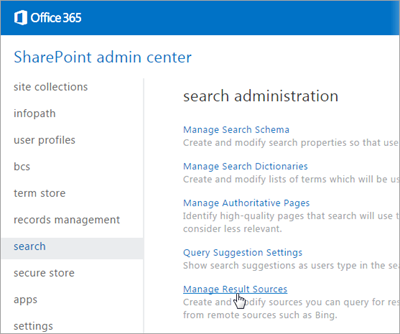
- Click Search, and then click Manage Result Sources.
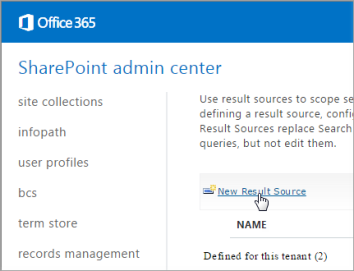
- Click New Result Source.
- Type or select the following settings.
Name - PolicyTech Search
Description - (optional)
Protocol - OpenSearch 1.0/1.1
Type - SharePoint Search Results
Query Transform - [searchTerms]
Credentials Information - Anonymous: This source does not require authentication.
- For Source URL what you provide depends on whether you are using the default PolicyTech interface or a custom interface web page.
For Default PolicyTech interface, type the URL in the following format.
https://[your PolicyTech URL]/api/opensearch/2014/06/?MethodName=GetDocuments&APIKey=[PolicyTech API key]&SearchField=ALL&itemsPerPage={itemsPerPage}&startIndex={startIndex}&SearchTerms={searchTerms}Make sure the protocol is https:// (secure). Replace [your PolicyTech URL] with the URL used to access your PolicyTech site. Replace [PolicyTech API key] with the key you created earlier.
Note: The URL must be one long string containing no spaces.
For Custom interface web page, type the URL for a custom interface web page.
- Click Save.
- Right-click in the white space to display a down arrow, click the arrow, and then click Test Source.
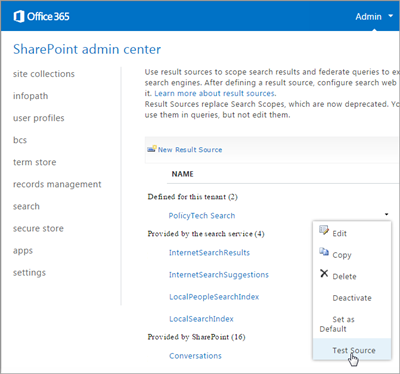
- When you see a Succeeded message, click OK.
Important: If the test fails, try executing it again. If it continues to fail, there is a configuration issue. Check the Result Source settings, especially the source URL. Also check the PolicyTech logs.
Add and Configure a Web Part
- In the Office 365 Admin Center, click Admin, and then click SharePoint.
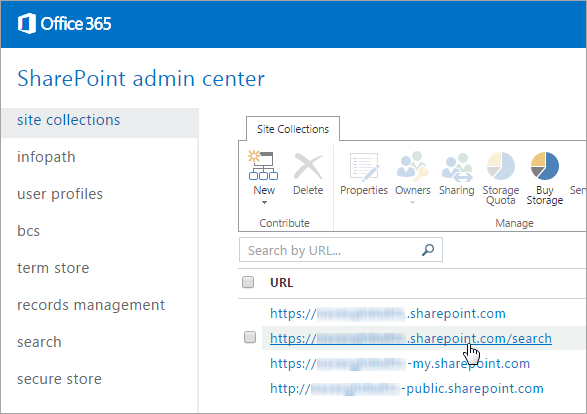
- Click site collections, and then click the desired search site.
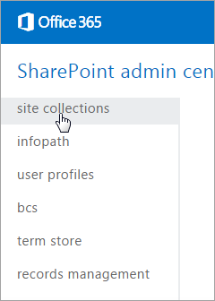
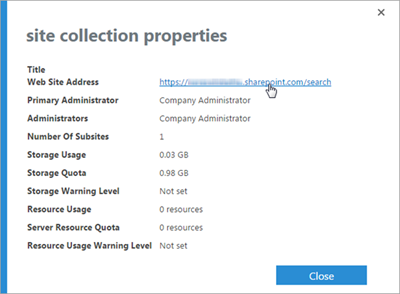
- In the site collection properties window, click the Web Site Address link.
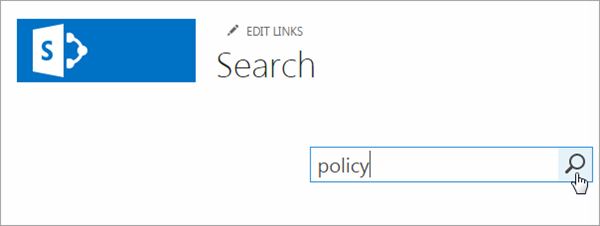
- Type any keyword, and then click
 .
.
- Click Add a Web Part, and do the following:
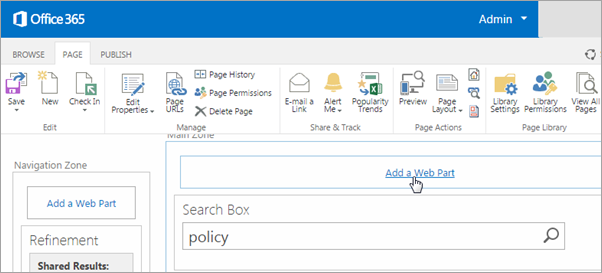
In the Categories column, click Search.
In the Parts column, click Search Results.
In the Add part to list, click Main Zone; and then click Add.
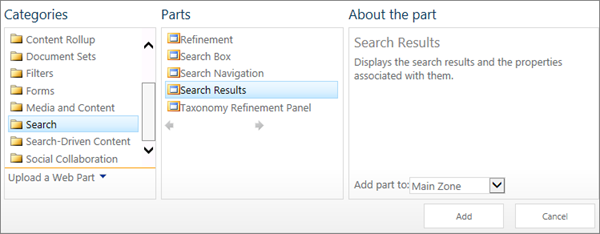
- The newly added web part is displayed at the top of the Main Zone. Click and drag the new web part below the Search Navigation part (or below another Search Result part) so that Search Box and Search Navigation are the first and second parts at the top.
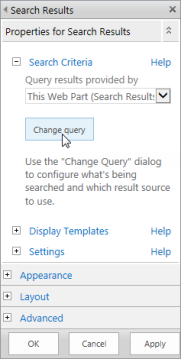
- In the new web part, click the down arrow near the upper right corner, and then click Edit Web Part.

- In the settings pane, click Change Query.
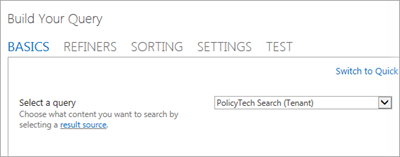
- For Select a query, click the name of the result source you created earlier, and then click OK.
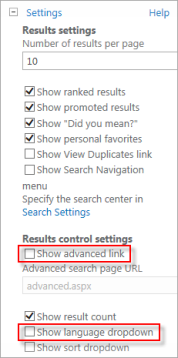
- Back in the settings pane, expand Settings, and then, under Results control settings, click to clear the Show advanced link and Show language dropdown check boxes, as these features are not compatible with the PolicyTech API.
- Expand Appearance, and then update the web part title, and then click OK.

- In the alert near the top of the page, click Check it in, and then click Publish this draft.

- Type a keyword that you know is contained in one or more PolicyTech documents, and then click
 . A list of PolicyTech documents containing the keyword displays.